Provincial Authentication
Once the Nova Scotia Birth Certificate and Registration of Live Birth are received from Vital Statistics, we need to have these two documents authenticated by a Notary Public in the Province before “Authentication by the Province” can take place.
Find a local Notary Public or Lawyer in the Province to arrange to have your documents notarized and picked up or contact a notary/lawyer in your birth province, if you are out of province. Be sure to do your research for a reasonable cost and check with the province that the notary/lawyer has obtained an official Notary Public designation and have their Seals and signatures on file with the Department of Justice.
**When getting documents Notarized, make sure that the Notary Public has dated, signed, printed and stamped their name beneath their signature and sealed (embossed) the documents or the documents will be rejected for authentication.
Copy the notary cover letter template for yourself to use and edit your information into it, print out in blue ink and sign the document with just your First and Middle name- Grantee with a blue pen. Print it out to send off with your certificates to be notarized and be sure to follow the mailing instructions provided at the bottom of this page before sending if you are out of province.
Once your notarized certificates are returned back to you or picked up, you are ready to copy and edit the authentication cover letter template to add in with your package of notarized certificates to be “Authenticated by the Province”. The document authenticator for the province may be an Agent of the Ministry of Justice, Attorney General’s Office or an Agent of the ‘Order-In Council’ of the associated Province that manages the document authentications.
Note: Some provinces request that you print and fill out their provided cover letters, you can do both in this case if you wish.
Click the link to follow the authentication instructions for this province and follow the mailing instructions provided at the bottom of this page before sending to ensure you properly document for your records.
Nova Scotia Authentication website: https://lt.gov.ns.ca/protocol/authentications
Mailing Instructions:
Your mailing packages will include:
- 10×15 white or brown envelopes: (sending & returning) 4x per man/woman/child
- Cover letters completed with your information
- Registered mail stickers: up to 2x per package
- Birth Certificates/ROLBs to be notarized
- Notarized copies to be authenticated
- Notary fee money order or proof of payment receipt
- Authentication fee money order
- Stamps for sending and return envelopes (check for what is needed for sending and returning envelopes when at post office)
Follow these instructions when sending to both the Notary and Authentications, be sure to fill out the cover letters accordingly. Sign the cover letters with just your First & Middle name with blue pen. (You’re not the visible King/Queen yet!) Have your Witness also sign the document with a blue pen. Put the long skinny domestic Registered Mail stickers on the top right hand side of your cover letter in the train tracks.*Optionally attach the other one to the receipt from the post office you get at the post office after sending.
- In the top left-hand corner of the Sending envelope in blue ink, write:
First Middle,
Near: Your home address,
[Postal code in square brackets]
- Put the correct sending address in the middle of the Sending envelope in blue ink (notary/lawyer address or authentication address).
- In the center of the Return envelope, in blue ink, write:
First Middle, Grantee
Near: Your home address,
[Postal code in square brackets]
(We want the Ministry to rubber stamp their address into the top left-hand side of the return envelope, so do not put their address there, leave blank)
- Put the folded Return 10X15 or 9×12 return envelope into the sending envelope. – folding this 10X15 envelope so they do not have to fold your notarized/ Authenticated documents. If you can not find one, you can use a 9X12 envelope and they will fold the bottom 2 inches of your documents backwards in order to fit them into your return envelope.
- Put one of the long Registered Mail stickers on the top right hand side of your cover letter and attach the other one to the receipt you get at the post office when sending and put the cover letter into the sending envelope.
- Include the correct fee in the sending envelope.
- Go to the Post Office and send Registered Mail.
- When your provincially authenticated documents come back, keep that Return envelope! This will serve as evidence later.
Put the envelope and your new provincially authenticated documents in your long 8.5X14 Estate binder when you get it, in order to keep them in good shape!!
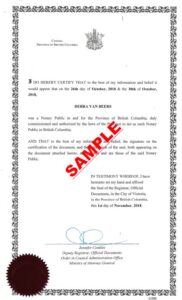
This is a sample of the Certificate that will Annexed to your Birth Certificate and ROLB:
Comments are closed.